


Installing travertine requires more than just aesthetics; it demands precision in preparation and cutting. To ensure a professional finish, you must use a high-quality modified thin-set for bonding and a diamond-blade wet saw for clean, chip-free cuts. This guide provides a direct technical roadmap for installing travertine tiles and pavers, helping you avoid common mistakes like improper leveling or using the wrong adhesive.
Installing travertine tiles starts with the right base, a layout that accounts for natural colour variation, and an adhesive system suited to the stone and location. For most bonded floor and wall installations, the sequence is: check the substrate, dry-lay and mark the tiles, cut them, apply a compatible natural-stone adhesive, set and joint the tiles, then seal if appropriate. Outdoor travertine pavers laid over a compacted base use a different construction method; see the distinction below before choosing materials.
Quick answer: To lay travertine tiles, prepare a clean, stable and suitably flat substrate; confirm any waterproofing and falls; dry-lay a mixed selection of pieces; cut with a water-fed diamond saw; fix with a compatible adhesive following its technical data sheet; keep consistent joints and movement joints; grout after the adhesive has cured; then clean and seal according to the stone and sealer instructions.
Travertine tiles or pavers: choose the installation method first
| Application | Typical method | What to confirm |
|---|---|---|
| Indoor travertine floor or wall tiles | Bonded installation on a suitable prepared substrate | Stone thickness, substrate movement, adhesive compatibility, grout and movement joints |
| Outdoor tiles on a concrete slab | Bonded external installation using a compatible system | Drainage falls, moisture, exposure, waterproofing where required and external-grade products |
| Outdoor travertine pavers on a prepared ground base | Engineered base and bedding method suited to the paver and site | Base depth, compaction, edge restraint, drainage and intended loads |
Tiles and pavers vary in thickness and finish. Do not apply the bonded tile steps to a sand-set path or a driveway without a design for that application. For a broader ground-base sequence, read Hunter Pavers’ paver installation guide. For available stone, sizes and finishes, browse the travertine tiles and pavers collection.
Tools and materials for travertine tile installation
| Item | Use |
|---|---|
| Travertine tiles and a few spare pieces | Allow for natural variation, cuts and breakage. |
| Water-fed wet saw with a stone-rated diamond blade | Make straight, accurate cuts with less dust. |
| Tape measure, straightedge, pencil and level | Plan the layout and check alignment and falls. |
| Natural-stone-compatible adhesive and notched trowel | Bond the tile to the approved substrate; choose the system for the site. |
| Spacers or levelling aids, as appropriate | Keep joints consistent while allowing for tile tolerances. |
| Suitable grout, rubber float and sponge | Fill and clean joints without damaging the stone. |
| Stone-compatible cleaner and penetrating sealer, if specified | Remove residues and help resist staining after the assembly is ready. |
| Eye, hearing and respiratory protection | Follow the saw and product safety instructions. |
How to lay travertine tiles: six practical steps
1. Prepare the substrate, drainage and waterproofing
Check that the floor or wall is sound, clean, dry enough for the chosen system, and free of loose coatings or contamination. Flatness, deflection and moisture matter more than appearance alone. Resolve cracks, movement and uneven areas using a method approved for the substrate. A timber subfloor, shower or outdoor slab may need a different build-up from an indoor concrete floor. For wet areas, complete and test the required waterproofing before tiling; for outdoor areas, confirm that water drains away from the installation.
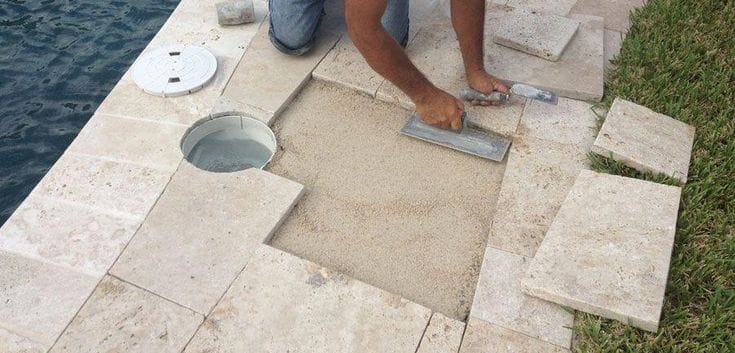
2. Dry-lay, sort and mark the tiles
Open several boxes and mix pieces across the area so the natural tones are distributed evenly. Dry-lay the pattern from a reference line, check doorways and edges, and avoid narrow slivers where possible. Confirm the joint width against the tile’s dimensional variation and the grout specification. Mark any cuts before the adhesive is mixed. Keep planned movement joints open; they should not be bridged with rigid grout.
3. Cut travertine tiles with a wet saw
How to cut travertine tile: measure twice, transfer a clear line to the stone, support the tile fully on the saw bed, and feed it slowly through a water-fed diamond blade rated for natural stone. Do not force the cut. Test a spare piece first, particularly for visible edges or tiles with open voids. A manual score-and-snap cutter can chip or split natural stone unpredictably; use a suitable wet saw for accurate finished cuts.
- Straight edge: support the stone and maintain water flow; make a steady pass rather than pushing hard.
- Notches and corners: make controlled relief cuts and finish carefully with a suitable stone tool; avoid overcutting the visible face.
- Holes and penetrations: use a suitable diamond hole saw and water cooling, leaving the clearance required around fixtures.
- After cutting: rinse off slurry, allow the tile to reach the condition required by the adhesive manufacturer, and ease exposed sharp edges if specified.
Wear eye and hearing protection, use the saw’s guards, and follow its electrical and silica-dust controls. Dry cutting stone can create hazardous dust. 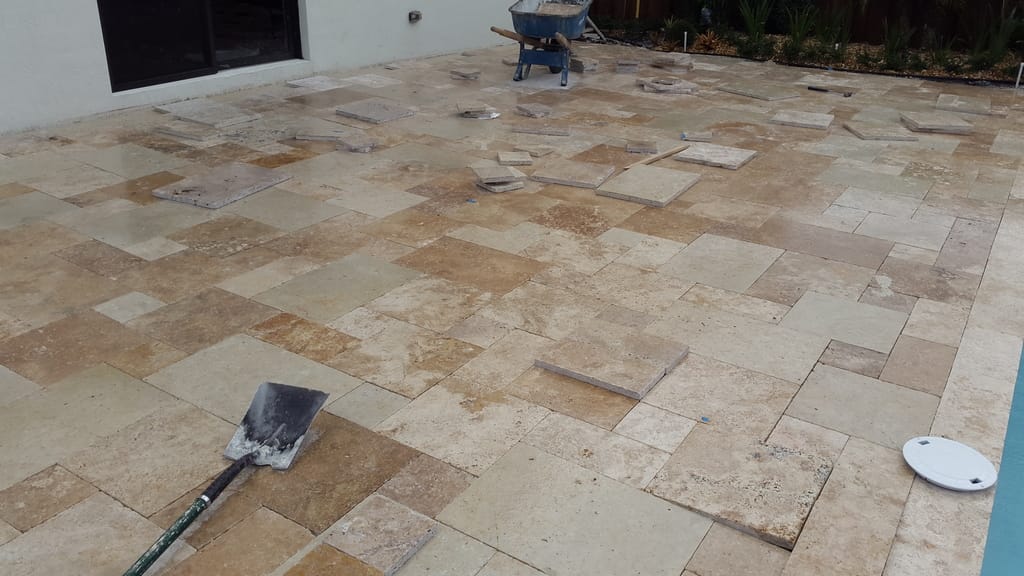
4. Select the adhesive and set the tiles
Use an adhesive that is approved for the particular travertine, substrate, tile size, exposure and wet-area conditions. Some natural stones are moisture sensitive or can show staining, so a generic premixed wall adhesive is not a universal choice. Mix and apply the selected product exactly as its data sheet directs. Spread only as much as can be covered within the adhesive’s open time; use the specified trowel and check contact by lifting a freshly placed tile. Large pieces may require back-buttering and a different bed thickness. Keep edges aligned without forcing neighbouring tiles into the same plane.
5. Grout and finish the joints
Wait until the adhesive has cured for the conditions on site, then use grout approved for natural stone and the selected joint width. Test grout and cleaning on a spare piece, particularly with open or unfilled travertine. Fill joints evenly, clean with a lightly damp sponge, and avoid leaving grout haze or acidic cleaners on the stone. Use the specified flexible sealant at movement and perimeter joints instead of filling them with rigid grout. Follow the product instructions for access and curing; a fixed 24-hour rule cannot cover every adhesive or climate.
6. Clean and seal when the system is ready
Travertine can absorb stains, but a sealer does not replace waterproofing, drainage or sound installation. After the adhesive and grout have reached the conditions required by their manufacturers, clean the stone with a pH-neutral product and test a penetrating sealer on an inconspicuous area. Apply and remove excess strictly to the sealer’s instructions. Re-seal based on wear and a water-absorption test, rather than assuming every installation needs a fixed yearly schedule.
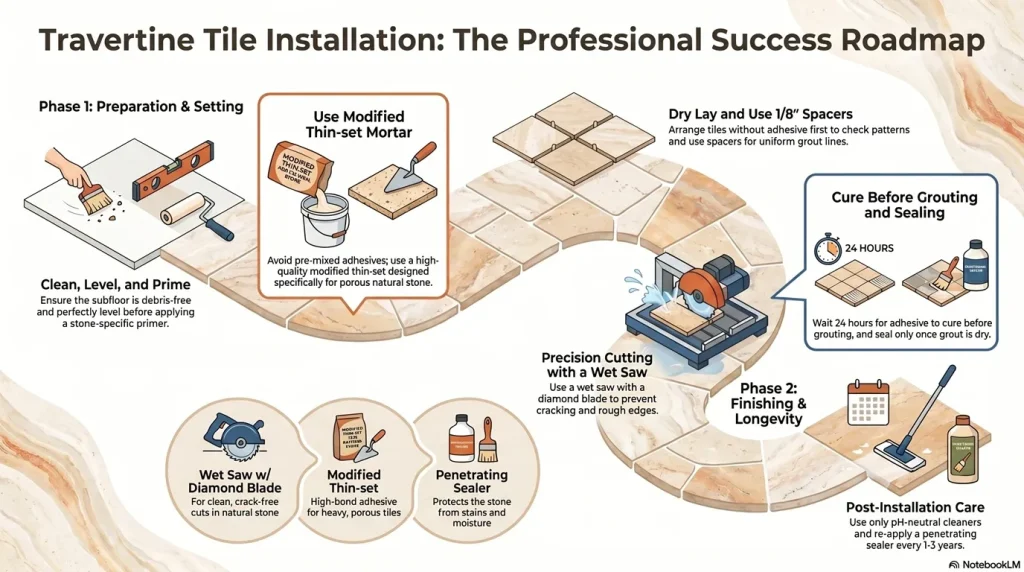
Common travertine installation mistakes to avoid
- Mixing up tiles and pavers: confirm the thickness and installation system before ordering the substrate, bedding or adhesive.
- Ignoring drainage and movement: standing water and restrained movement can cause problems even when the tile itself looks sound.
- Using an incompatible adhesive: check suitability for natural stone, moisture exposure, tile size and substrate.
- Cutting without a test piece: natural voids and edge profiles can affect the finished cut.
- Grouting or sealing too early: follow the actual curing and moisture conditions in the product data sheets.
- Cleaning with acid: acidic products can etch calcium-based travertine; use a stone-safe cleaner.
Choosing travertine for the project
Plan the stone finish, format and thickness alongside the installation method. A honed interior tile, a tumbled outdoor paver and matching pool coping do different jobs. Browse Hunter Pavers’ travertine range, including Ivory Travertine and Silver Travertine, then check each product’s available finishes and sizes. For an outdoor area or a material estimate, contact Hunter Pavers with the area, substrate, intended use and preferred finish.
Frequently asked questions about installing travertine
How do you cut travertine tile without chipping it?
Use a water-fed saw with a suitable diamond blade, support the tile, feed it steadily and test on a spare piece. Keep the cut face and blade clean.
Can travertine tiles be installed directly over plywood?
Only when the timber floor and approved underlayment or decoupling system meet the stone and adhesive manufacturer’s requirements for stiffness and movement. Have the build-up checked before laying stone.
What adhesive should I use for travertine tiles?
Choose a natural-stone-compatible adhesive specified for the substrate, tile size and exposure. Some stone or wet-area installations require a more specialised system; follow the product data sheet.
How long before I can grout or walk on travertine?
The wait depends on the adhesive, bed thickness, temperature and moisture. Use its published curing times for grouting and foot traffic rather than assuming a universal 24 hours.
Is laying travertine pavers the same as installing tiles?
No. Bonded tiles need a compatible substrate and adhesive system; some outdoor pavers use an engineered compacted base and bedding system. Check the paver thickness, site drainage and expected loads.