Paver installation is a popular and effective way to create functional, aesthetically pleasing surfaces in outdoor spaces. Whether you’re looking to build a beautiful patio, a durable driveway, or an inviting garden pathway, the foundation of any successful paver project lies in a proper installation process.
When installed correctly, pavers offer numerous benefits, including long-term durability, low maintenance, and versatility. They provide a clean, sleek appearance while being extremely sturdy, able to withstand heavy traffic, varying weather conditions, and even harsh climates. Unlike traditional poured concrete, which can crack and degrade over time, pavers maintain their integrity for many years, thanks to their individual pieces interlocking and providing inherent flexibility.
Table of Contents
Preparing the Ground for Paver Installation
Proper preparation of the installation area is the most crucial step in ensuring your pavers stay in place and last for years. Without the right foundation, your paver surface could shift, crack, or become uneven over time. Here’s a detailed look at how to prepare the ground for a successful paver installation.
Step 1: Selecting the Right Location
Before beginning the actual preparation work, it’s important to determine where you want to install your pavers. Ensure that the area has proper drainage to prevent water from pooling. If installing pavers on a driveway or other high-traffic area, consider the load-bearing capacity of the ground. For patios or garden paths, make sure the ground is even and stable.
Step 2: Clearing the Area
Start by clearing the area of any vegetation, grass, rocks, or debris. This can be done manually or with the help of gardening tools. Use a shovel or spade to remove grass and roots. It’s crucial to remove all plant matter, as leftover roots can continue to grow, pushing up against the pavers and causing them to become uneven over time.
If the area is large, a lawnmower or string trimmer may be helpful to speed up the process. For areas with larger trees or bushes, you may want to consider using a weed killer to ensure that no unwanted plants regrow in the future.
Step 3: Measuring and Marking the Area
After clearing the area, measure and mark out the shape of your paver installation. Use string or stakes to outline the dimensions, ensuring that the layout is accurate. The area should be at least 4 to 6 inches wider and longer than the pavers themselves to allow for proper spacing and edging.
Use a measuring tape to confirm the measurements, making sure everything is square. For curved installations, use a garden hose or flexible string to create the desired curve. Proper measurements are critical to achieving a symmetrical and neat result.
Step 4: Excavating the Ground
Once the area is marked, the next step is excavation. Begin by digging out the surface to a depth of at least 6 to 8 inches (or deeper, depending on the area’s expected traffic). The depth should include room for both the base material and the sand layer. For high-traffic areas like driveways, you may need to dig deeper.
Use a shovel or digging machine to excavate the soil evenly. Make sure that the base of the excavation is level to avoid uneven paver installation. The surface should also slope slightly, typically around 1/4 inch for every foot, to ensure water drains away from the pavers rather than pooling.
Step 5: Adding and Compacting the Base Layer
Once the area has been excavated, it’s time to add the base layer. This layer is crucial to support the weight of the pavers and prevent shifting. Typically, crushed gravel or crushed stone is used for the base, as it offers excellent drainage and stability.
Spread the gravel evenly over the excavated area, creating a layer that’s 3 to 4 inches deep. Use a rake to level the gravel, and then compact it using a plate compactor or hand tamper. The compaction process will ensure the gravel settles and forms a solid, stable foundation for the pavers.
Step-by-Step Guide to Installing Pavers: A Detailed Process
For paver installation, first, spread a 1-inch layer of sand over the compacted gravel base and compact it using a plate compactor. Then, lay the pavers according to the design or guide lines, cutting them as needed for the edges. Finally, fill the joints with sand, compact the surface, and optionally apply a sealer to protect the pavers.
Step 6: Laying the Sand Layer
Before you start laying the pavers, it’s essential to create a smooth, even base for them to settle into. This is where the sand layer plays a crucial role in the paver installation instructions. The sand layer acts as a leveling bed and cushioning material, ensuring that the pavers fit snugly and remain stable over time.
Start by spreading a 1-inch thick layer of coarse sand evenly over the compacted gravel base. The sand should cover the entire area where you plan to install the pavers. It’s important to use coarse sand because it is more stable and compacts well, which helps to avoid shifting over time.
Once the sand is spread, use a rake to level it out. For perfect leveling, you can use a board or a straight edge. Lay it across the surface and drag it over the sand to create a perfectly even layer. This is a critical step in the paver installation instructions, as any unevenness in the sand layer can cause the pavers to become unstable and uneven.
After leveling the sand, lightly compact it using a plate compactor. This step is crucial because it firms up the sand while still maintaining its flexibility, which allows the pavers to settle in evenly without shifting. Be sure to compact the sand evenly, making several passes with the compactor to create a solid foundation.
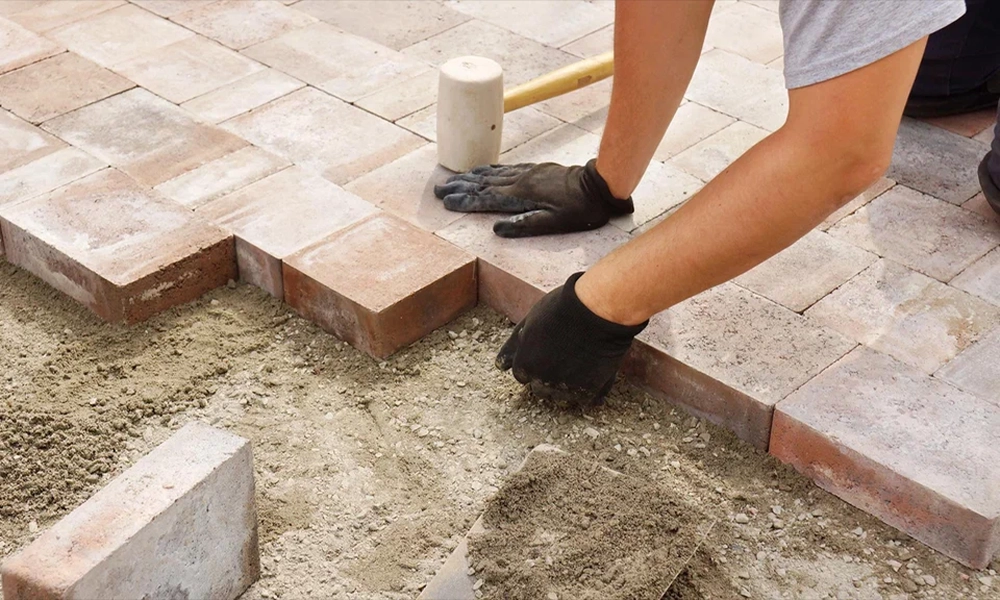
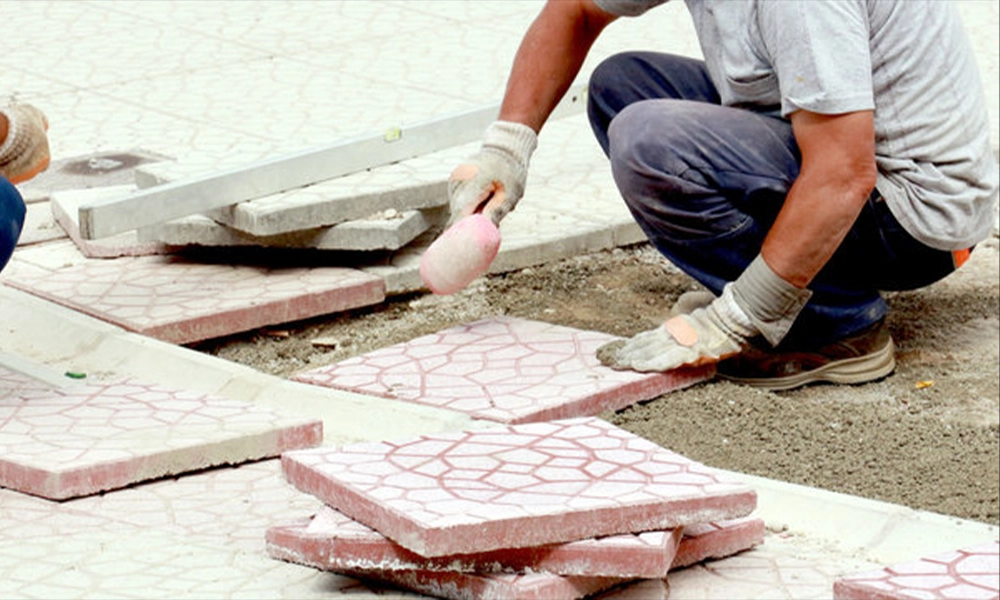
Step 7: Laying the Pavers
Now that you have a level and compacted sand layer, you’re ready to start laying the pavers. This part of the paver installation instructions is where the design and layout come to life. Begin at one corner of the prepared area and place the first paver in the desired position. As you continue, place each subsequent paver close together, leaving only a small gap between them for joint sand.
When laying pavers, it’s essential to maintain straight lines or follow your desired pattern. For straight layouts, use a chalk line or string to guide you, ensuring that the pavers remain aligned throughout the process. This will keep the installation neat and professional, creating a clean, organized look. If your project involves curved patterns, carefully follow the marked layout to maintain a smooth curve, which may require some flexibility and attention to detail.
Use a rubber mallet to tap each paver into place gently. This helps to settle the pavers into the sand bed and ensures they are level with each other. Don’t force them into place; allow the mallet to do the work. It’s important to make sure that each paver is aligned with the others and forms a consistent level surface.
Continue laying pavers row by row until the entire area is covered. As you work, regularly check the alignment and levelness of the pavers to avoid any uneven spots.
Step 8: Cutting Pavers for the Edges
When you reach the edges of your installation area, you will likely need to cut some pavers to fit the space. Cutting the pavers for edges is an important part of the paver installation instructions, as it ensures the project looks finished and polished. Proper cuts will make the edges of your installation area look seamless and professional.
To cut pavers, use a wet saw or paver splitter. A wet saw is ideal for cutting pavers that need precise cuts, especially if the edges need to be shaped to fit curves or irregular spaces. Measure the space where the cut is needed, then mark the paver with a pencil. Using a straight edge, mark a line across the paver to guide your cut.
When cutting the pavers, wear safety goggles and gloves to protect yourself from debris and dust. Once the pavers are cut, carefully place them along the edges of your layout. Make sure they fit snugly and align with the rest of the pavers.
If you’re using a paver splitter, ensure that you place the paver in the splitter’s jaws, and gently apply pressure until it breaks cleanly along the line you’ve marked.
Step 9: Compacting the Pavers
After all the pavers are laid, the next step in the paver installation instructions is compacting the surface to ensure the pavers are properly set into place. This is an essential step in the installation process, as it helps to lock the pavers into position and prevents them from shifting over time.
To compact the pavers, use a plate compactor. Before using the compactor, place a piece of plywood over the surface of the pavers to protect them from damage. The plywood will prevent the compactor from scratching or damaging the surface while applying pressure.
Run the plate compactor over the entire area, making several passes to ensure that the pavers settle securely into the sand base. Be sure to cover the entire surface, including the edges, to ensure an even compaction. This will help the pavers remain in place and form a solid, stable surface. After compacting, check the surface for any uneven spots or loose pavers, and tap them back into place with the rubber mallet.
Step 10: Filling the Joints with Sand
The next step in the paver installation instructions is filling the joints between the pavers with joint sand. The joint sand helps lock the pavers in place, preventing movement and providing stability. It also reduces weed growth and water infiltration, which can cause damage over time.
Spread a layer of sand over the surface of the pavers, and use a broom to sweep the sand into the joints. Make sure to fill all the gaps between the pavers completely. Once the joints are filled, use the plate compactor once again to settle the sand into the joints. Run the compactor over the entire surface to ensure that the sand is evenly distributed and firmly packed into place.
After compacting, sweep away any excess sand from the surface of the pavers. You may need to repeat the process of adding and compacting sand a couple of times until the joints are completely filled and the surface is smooth.
Step 11: Sealing the Pavers
To provide additional protection and enhance the appearance of your pavers, you may choose to apply a sealer. This is an optional step in the paver installation instructions, but it offers several benefits that can prolong the life of your installation.
Sealing the pavers will help protect them from stains, weathering, and dirt buildup. It also brings out the natural colors and textures of the pavers, giving them a more polished, finished appearance. Additionally, a sealer can make it easier to clean the surface, as it creates a protective barrier against dirt and grime.
To apply the sealer, use a sprayer or a roller. Make sure to follow the manufacturer’s instructions for the specific type of sealer you’re using. Apply the sealer in thin, even coats, allowing it to dry between layers. Once the sealer is applied, allow it to dry completely before using the surface.
Sealing pavers is especially beneficial in areas where the surface will be exposed to the elements, as it adds a layer of protection against UV rays, rain, and freezing temperatures.
Conclusion
By following these detailed paver installation instructions, you’ll create a beautiful, durable, and functional outdoor surface that will last for years to come. Whether you’re installing a new patio, pathway, or driveway, each step plays a crucial role in achieving a high-quality result. For the best materials, consider using Hunterpavers, known for their durability and aesthetic appeal.
Proper preparation, careful installation, and regular maintenance are all key to ensuring that your pavers stay in place and retain their visual appeal over time. So, take your time, follow these instructions, and enjoy the process of creating a space that you and your family can enjoy for many years. Happy paving!
Unika is a stone industry specialist based in Australia, with over 10 years of experience in sourcing, designing, and delivering premium natural stone solutions for residential and commercial projects.
For most paver installations, you should excavate the ground to a depth of at least 6 to 8 inches. This depth includes space for both the base material and the sand layer. For high-traffic areas like driveways, you may need to dig deeper to ensure the foundation is strong enough to support the weight.
Coarse sand is ideal for creating the sand layer in paver installations. It compacts well, providing a stable foundation that helps prevent the pavers from shifting over time. Avoid using fine sand, as it may not compact as effectively and could lead to instability.
While sealing is an optional step, it’s highly recommended, especially for areas exposed to the elements. A sealer helps protect the pavers from stains, weathering, and dirt buildup. It also enhances the colors and textures of the pavers, giving them a polished, finished look. Be sure to follow the manufacturer’s instructions when applying the sealer.